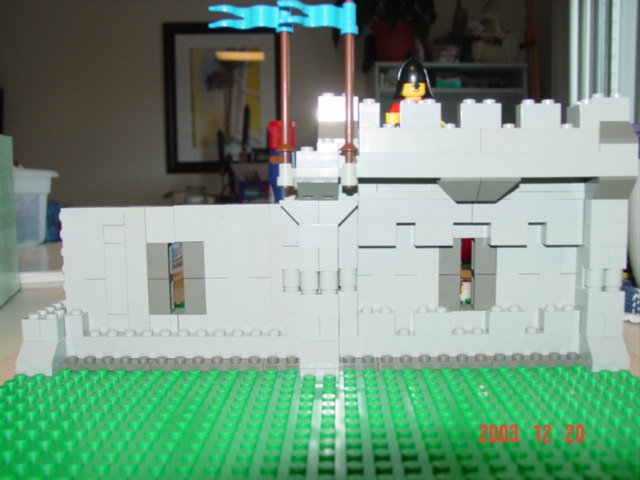
I have not seen anyone here on 3C do sideways or angled bricks, so here is an example. For this 3C-compat wall I built frames for the 'wall' sections to rest in. Each wall section -- there are 4 total -- is on it's side. I have the sections facing studs-away from each other so the reverse slopes can make nice angled arrow slits in the wall. I left all the decorative stuff off so you can see the detail. Also, there is a complete section of pics on BS showing the stages of construction if you would like to use the technique.
Dragon Master! *laugh* I can always count on ya to comment! Thanks!
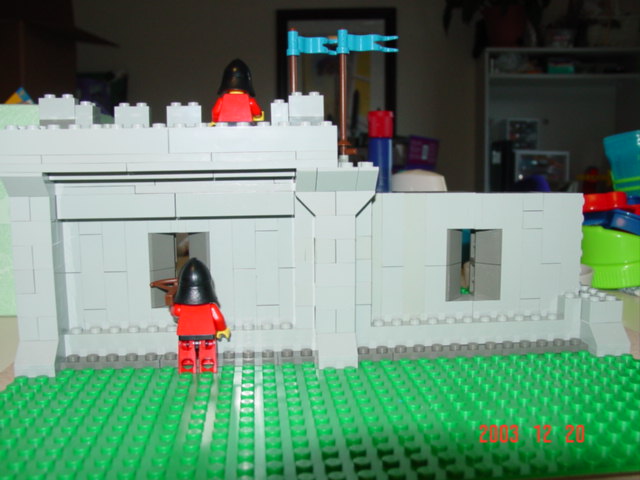
I realize I should have put the back picture up, it shows the slants for the arrow slits -- which is what I was looking for. I also thought about using the regular slants (and facing the studs the other way) and that would work just as well if you used tiles to hide the studs--and so the wall sections would match up..
Dragon Master! *laugh* I can always count on ya to comment! Thanks!
I guess you are a Psychic, because I was gonna comment in the future. *eerie music, flashing lights* I like them. They look great from the second angle in the picture you posted. I need resonable arrow slits, so I may make those when I get the time/parts.
Legofreak
"I have looked for you. Now you have come to me. And I thank you." -Pope John Paul II
I really like the look of it, though It's a shame that it's so part intensive (as SNOT (studs not on top) usually is). Granted, it's not very part intensive, but more so that I can use.
I have my own idea for a non-SNOT arrow slit, but I won't be able to show it off till my next castle MOC is finished.
I like the look of this, but I think the slot itself is a tad too wide. That being said, I could see myslef using this method in a few key areas on the castle I am working on, perhaps with some 1x plates to shrink the gap a little. Thanks for sharing,
Will
After a long absence, I have returned. I can't wait to start building again.
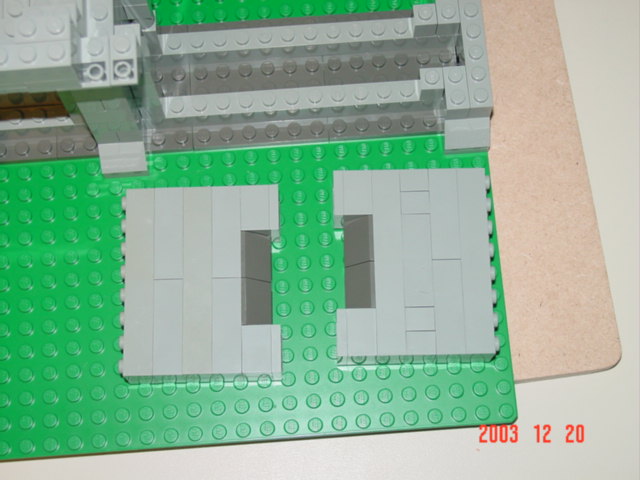
Ah! You can adjust the width of the slot in increments of 1/3 brick -- if you look at the pics where I have the wall sections on their sides, I've used two - thirds brick spacing in there; you can go as low as one.
The nice thing about these walls in the 'frames' you can adust things like that -- the two halves of the wall are not actually connected to anything (each other or the frame) so you can slide them around how ever you like.
Let me know if you want a more detailed pic of the construction!


