Page 1 of 2
Lavaman
Posted: Thu Sep 30, 2004 4:10 pm
by LEGOFREAK
Ok - here is my latest project..
I am making hot lava monsters for my sons side of the table (that kid gets all the cool stuff!)
Any suggestions on how I can get the cracks in his skin to "glow"?
I tried varying the shades from yellow to red in a separate layer, and even tried putting a lens flare in (i took that back out because it didnt look right). then I tried a neon glow effect, didnt look right either, unless i am just doing it wrong.

any help you can give me making him perfect will be appreciated.

thanks
(as usual - pic=link)
Edited :
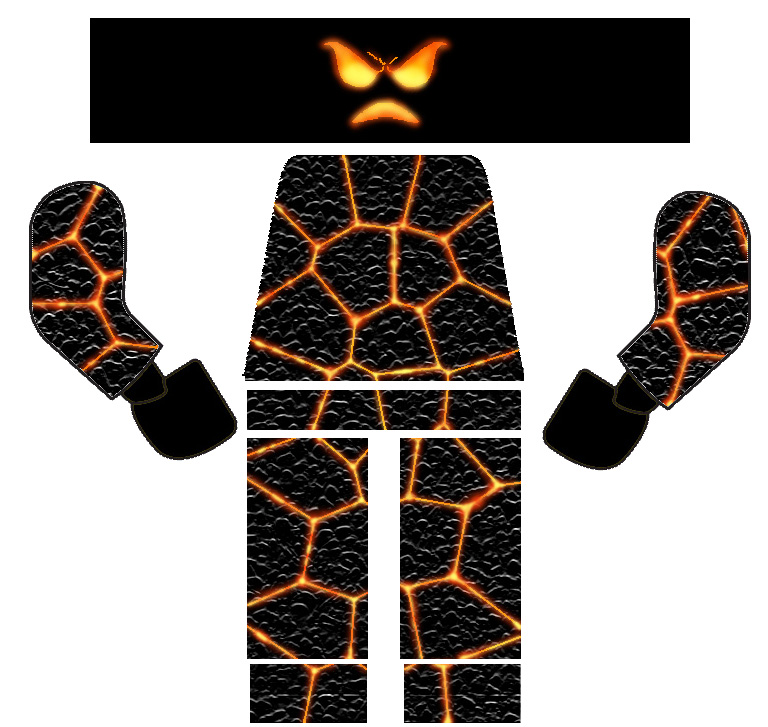
Thanks TTK and Anthony - I combined your answers to do this:

I went a bit heavy on the lines and highlights because when it shrinks down to 1.5 cm some of the detail gets lost. I am really happy with the way this turned out! I can't wait to print them and apply them, but for now its cool to just have that done.
Posted: Thu Sep 30, 2004 4:22 pm
by SavaTheAggie
I'd probably go over it with an airbrush of a matching color to the crack at a pressue or 5% or so, following the lines as best I could and changing colors when necessary.
--Anthony
Posted: Thu Sep 30, 2004 4:49 pm
by Green Fox
This won't help with the Photoshop, but you could print out the head decal on clear paper and sticker over a trans-orange head. No ideas for the rest, though.
Posted: Thu Sep 30, 2004 4:55 pm
by forester3291
I personally think it looks great as is
I don't have photoshop so I can't help you in that area. Sorry

Posted: Thu Sep 30, 2004 5:07 pm
by TwoTonic Knight
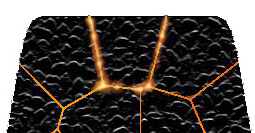
I set my airbrush down to 13% - it depends on how well you can control it. 5% seemed way too slow to work for this. I worked with two colors to be quick about it.
From swatches: Pure Red Orange as one color and Pastel Yellow as the other. I'd cycle between the two from the side toolbar. Set your airbrush to 5-9 "soft" spray. Overlay the lines you have laid down with the red-orange - you want to blur our their hard edges to get a "glow" effect. Go wider on areas where you want to create a "hot spot". Working with a smaller brush size, go back over the line with the pastel yellow, again lingering and building up hot spots. Keep the lines irregular in width to give it a more lively look.
That should get you going.
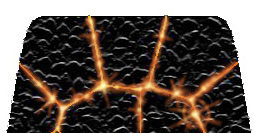
Edit in: And here is that section worked over a little more with some hand done "lens flare".
Posted: Thu Sep 30, 2004 7:43 pm
by forester3291
Wow Freak. That second version rocks my socks. I may defenintly have to print these up.
Posted: Thu Sep 30, 2004 7:50 pm
by cd536
Freak
Those are awesome. I may need a few myself...and I dont even have a lava table.
Posted: Thu Sep 30, 2004 7:58 pm
by Sir Terrance
Does anyone have Bitmap templates of these parts? They need to be bitmap since jpegs mess everything up for me. If you have them please e-mail me a link (preferred) or an attachment.
Anyways, these rock! I love the glow and can't wait to see them on a fig. Nice work!
Posted: Thu Sep 30, 2004 8:01 pm
by MaxiVisVires
LFreak, those look awesome. I'd use them, but I am wondering how to apply the arm and leg and waist decals without going crazy.
Posted: Thu Sep 30, 2004 8:18 pm
by TwoTonic Knight
Nicely updated. I delibrately overdid my examples a bit so you could see how that looked and decide if you wanted to tone it down. I'm looking forward to the finished product, though please do print it on photo paper or you will lose the contrast necessary to make this work (and probably get too much bleed from the black).
Dunno how you are going to get the arms to work, though. Brave of you to try!
Posted: Thu Sep 30, 2004 8:29 pm
by LEGOFREAK
TwoTonic Knight wrote:Nicely updated. I delibrately overdid my examples a bit so you could see how that looked and decide if you wanted to tone it down. I'm looking forward to the finished product, though please do print it on photo paper or you will lose the contrast necessary to make this work (and probably get too much bleed from the black).
Dunno how you are going to get the arms to work, though. Brave of you to try!
Thanks! your pictures REALLY helped.
And I am planning on using decals instead of stickers on this one. Jared (Kamino) thinks they'll look pretty sharp, and he has one of the printers that can print white behind it, so it'll end up on a clear decal. over at
Red Bean Studios they have a whole section on this. Including the arms. I am not as brave as you think.
Posted: Thu Sep 30, 2004 10:45 pm
by Robin Hood
Freak: you know what my opinion is on this.
Question though. Were in photoshop do you work this?
Dan
Posted: Fri Oct 01, 2004 5:18 am
by The Blue Knight
Lava monsters! My son is going ape for them! What a great idea. I need to get a PS or some variant thereof to see what all the hoopla is about. I'm interested to see how the arms and legs work out.
Posted: Fri Oct 01, 2004 7:02 am
by Ramus
Here are a couple pics of your design printed & applied.
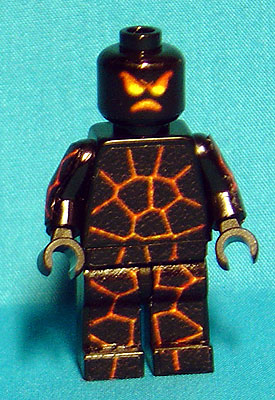
These were printed on laser & glued on. A decal print would be great for conforming around the curved parts.
http://www.brickshelf.com/gallery/Ramus ... vaman1.jpg
http://www.brickshelf.com/gallery/Ramus ... vaman2.jpg
Gallery when public:
http://www.brickshelf.com/cgi-bin/gallery.cgi?f=100083
It captures the feel of a lavaman / monster well.
My one suggestion when you finalize the design, space the individual components a little further apart. (if not alot) Cutting them apart is a chore.
Great job.
-- Ramus
Posted: Fri Oct 01, 2004 7:08 am
by lil Jon
Hmm, looks ok on a figure, but i dont know how durible those leg/arm stickers are if one were to handle it a lot.
Is the decal process more durible than the stickers? I mean will making the minifig sit down ware away the decal?
