 
       
|
Building a landscape
DNL and SlyOwl
DNL's article
Ground - variations in height and color
Water - various ways of making water, waterfalls
Vegetation - trees using plant pieces, trees using normal bricks, small plants
Rocks - made using BURPs, slopes, SNOT and tilted rocks
SlyOwl's appendix
Grass-scaping
Water-scaping
Rock-scaping
Ground
- Differences in height
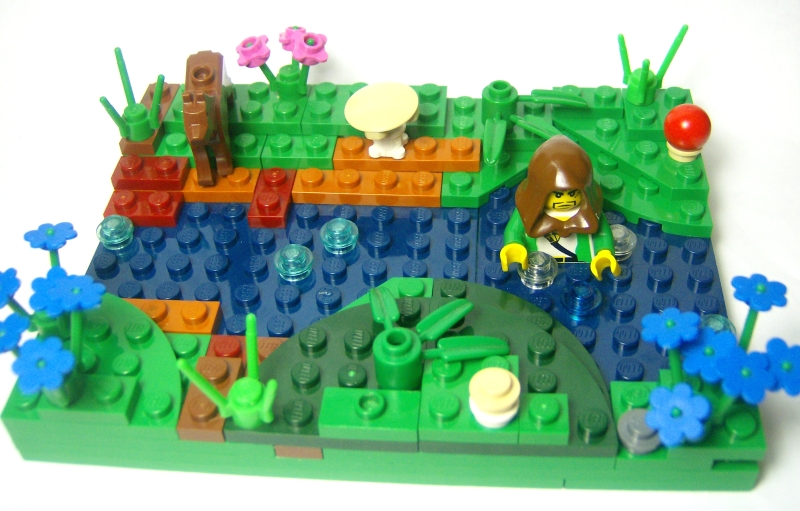
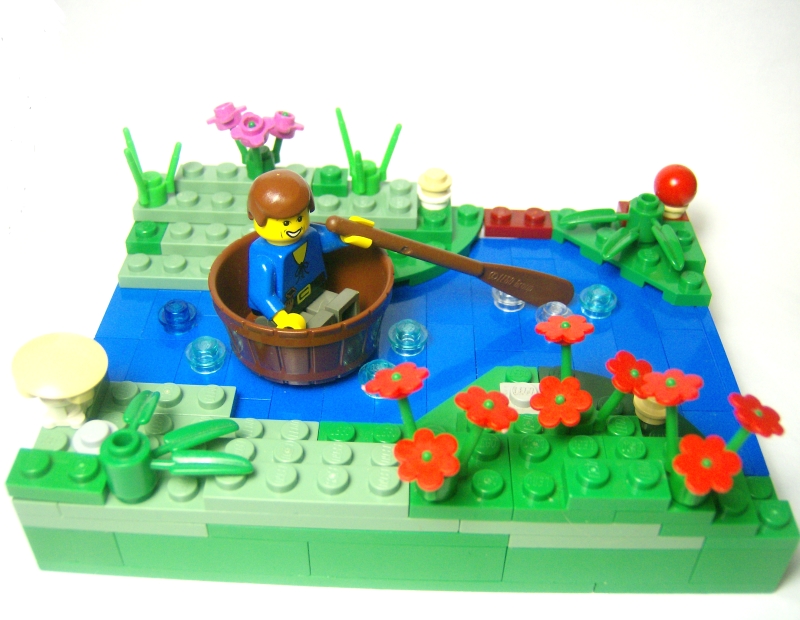
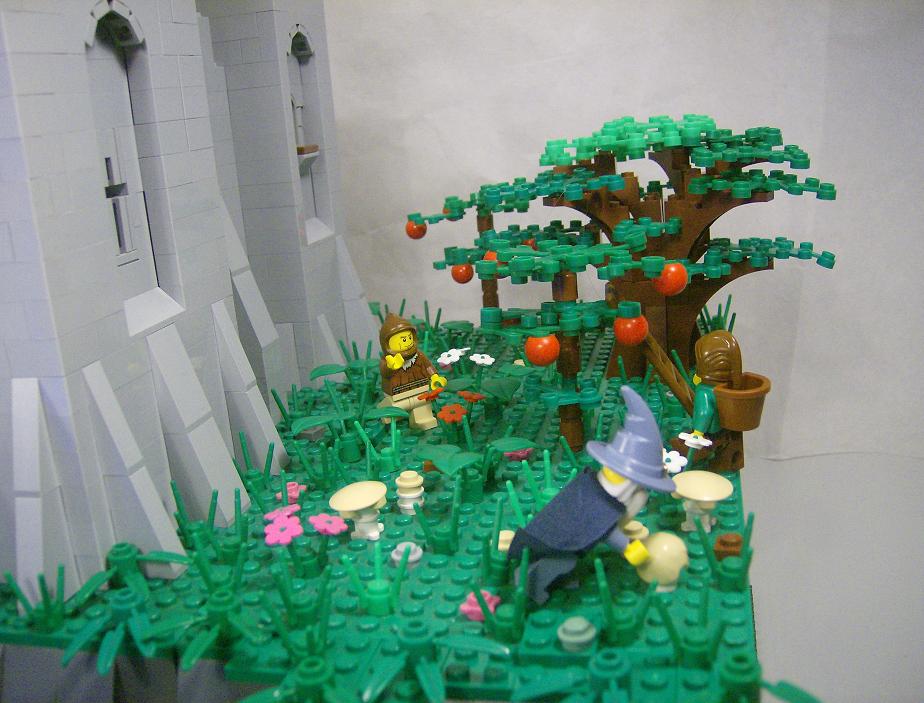
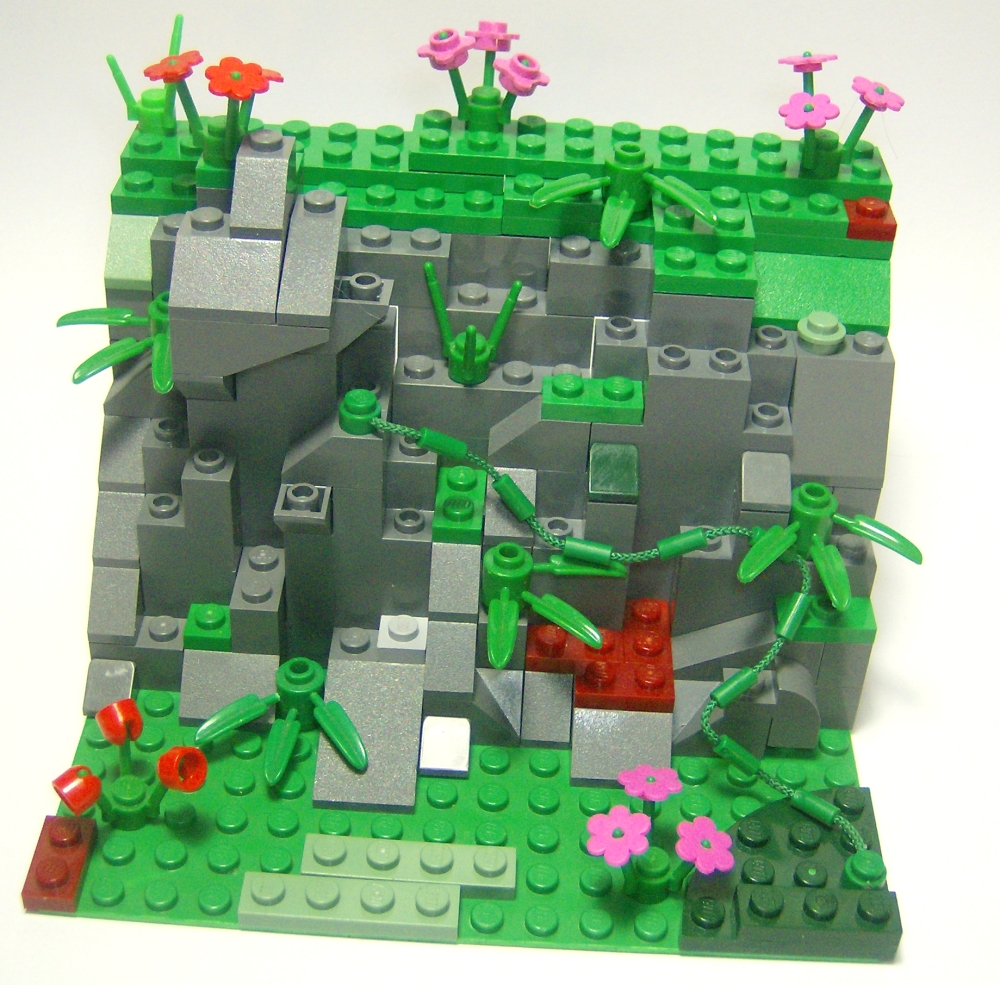
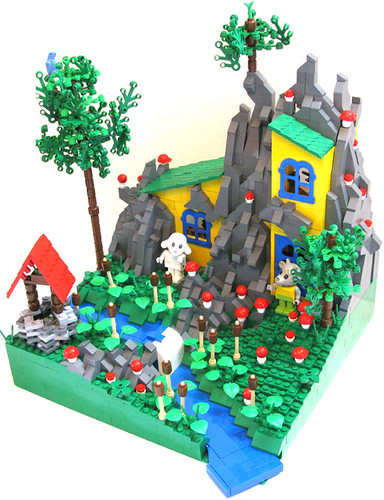
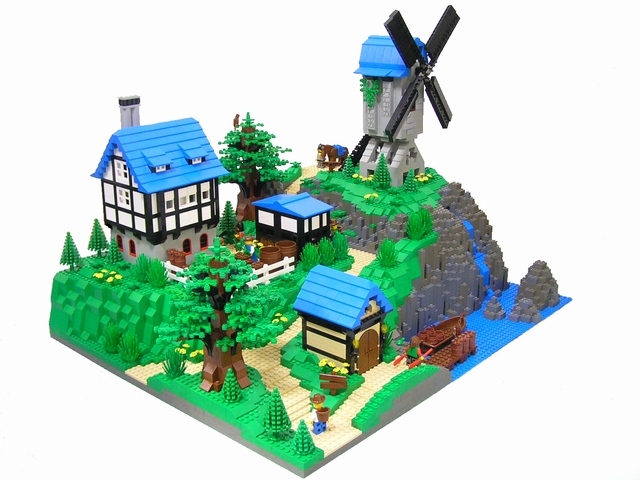
A landscape without differences in height looks kind of dull. Its easy to grab a baseplate and place some flowers on top of it, but that does not really make it a realistic and interesting looking landscape. This landscape for example:
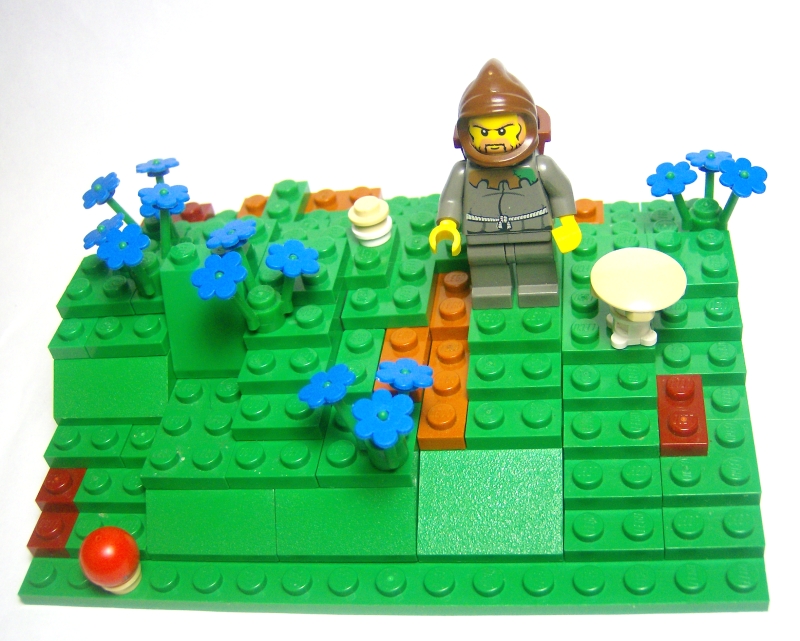
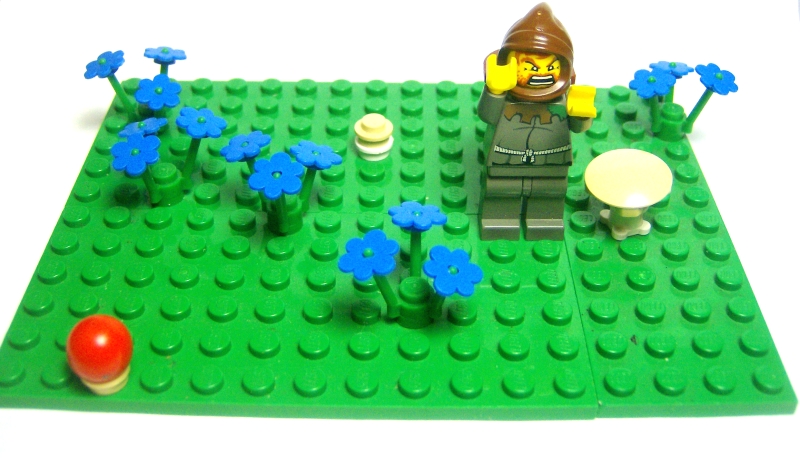
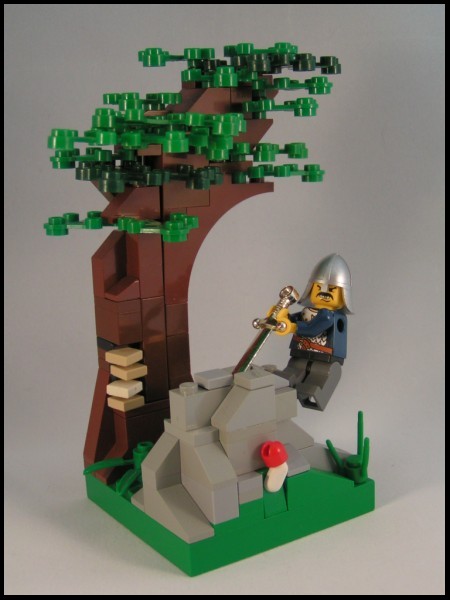
Looks much more interesting than this one:
- How to create differences in height
The most common way of creating differences in height is simply by stacking plates so the landscape gets one plate higher for each stud. I always make sure the difference in height is not more than one plate at a time, otherwise the landscape would look to blocky. If the difference has to be more than one plate at a time to create a steep hill or rock I personally prefer to use green slopes or gray rocks.

Another way to make a gentle slope in your landscape is by attaching plates to hinges, like in this MOC by Marakoeschtra:
This looks smooth, but when you're using that technique it is harder to make different angles and the landscape may look unnatural. A third way to make diffences in height in you landscape is by building a wall of 1x2 bricks. The wall will bend slightly, and that way you can make a gentle and smooth hill, like in this MOC by SlyOwl:
- Colors
A real landscape usually consists of more than one colour, and using several colours in a LEGO landscape makes it look more natural. Example;
Water
There are several ways to make a river or pond, here are some examples:
- Water with studs
This is the easiest way to make water. It doesnt look smooth, but that doesnt really matter if you make a wild river or windy lake.
- SNOT water
This technique is being used a lot lately. Its simple and cheap to make if you have enough blue bricks. This looks more realistic if you build a lake or calm river.
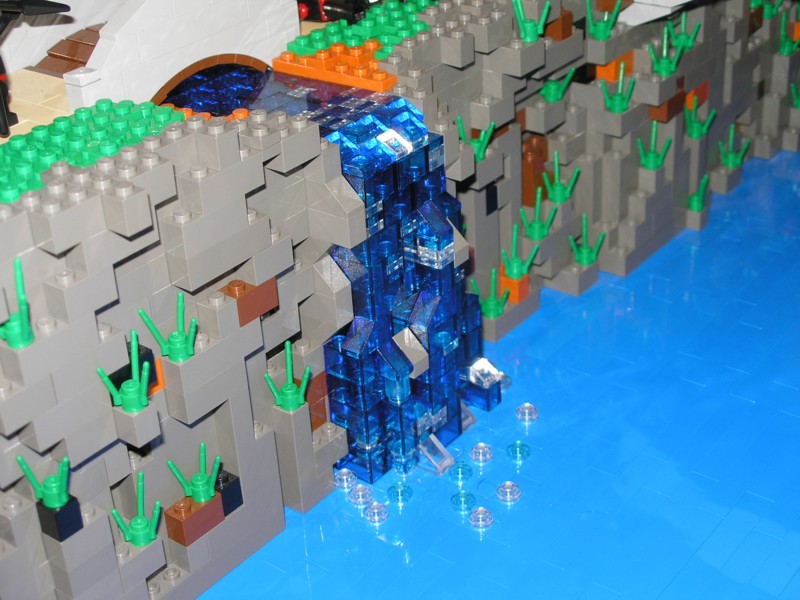
- SNOT water with transparent bricks
Instead of normal blue bricks you can also use transparent ones. This looks more like water, but transparent bricks are not cheap, and you can see the edges and inside of the bricks, which makes the water look blocky. This technique is perfect if you want to show something underneath the water, like a body or fish.
 (by Thomas Wunz (remyth))
- Transparent tiles
This is my favourite way of building water. It looks nicer than using transparent bricks, because its harder to see the edges, especially if you use dark plates underneath the tiles. The great thing about this way of making water is that you can use differently colored plates underneath the tiles to make it look as if the water is getting deeper.
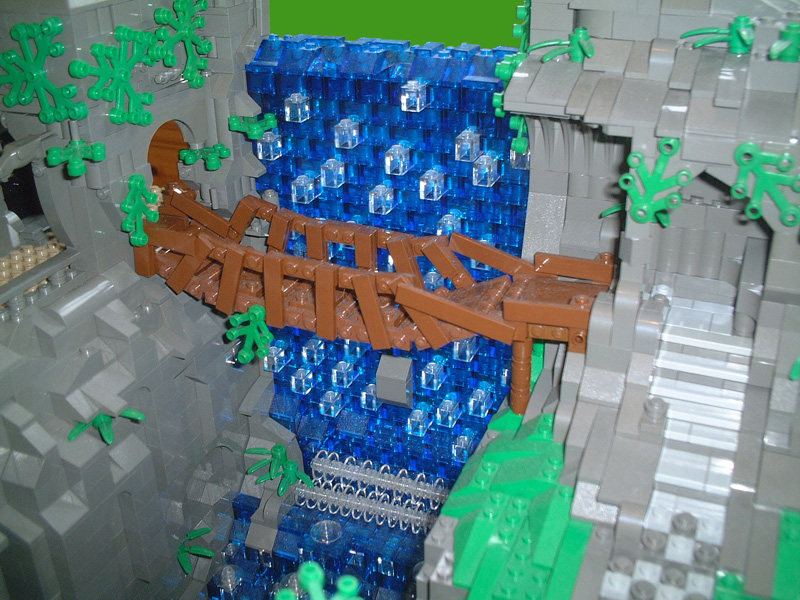
- Waterfalls
There are many ways to make waterfalls, here are some examples:
 (by Mark Kelso)
 (by me)
 (by Norro)
 (by Jens schlimps)
 (by John Langrish)
Vegetation
Vegetation is an important part of any landscape. There are many different ways to make plants and trees.
Here is a how-to article by Anthony Sava about foliage.
Here is a Flickr group devoted to LEGO vegetation.
There already is an How-To article about foliage, but Savas article is very outdated, so I have gathered pictures of some new techniques to make trees and plants.
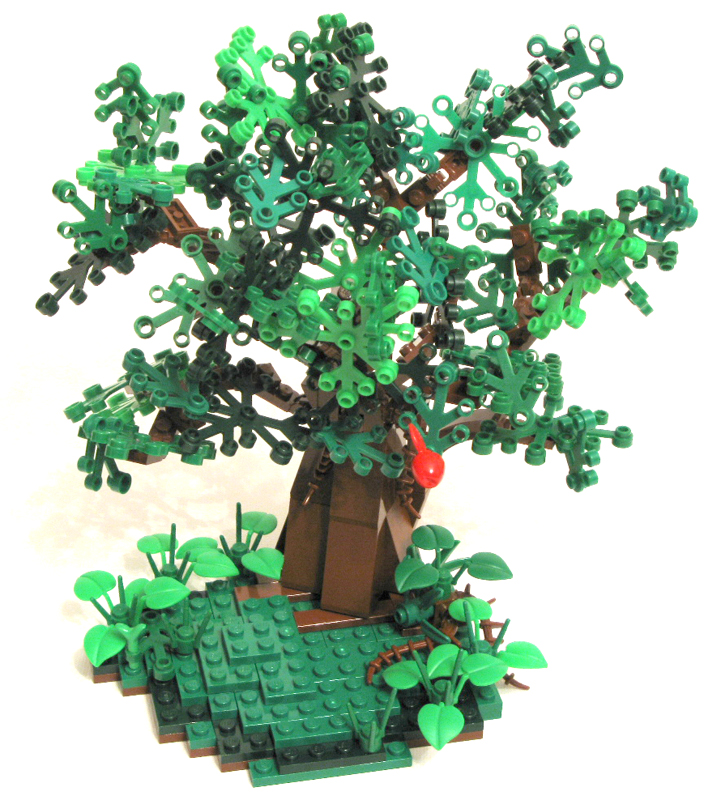
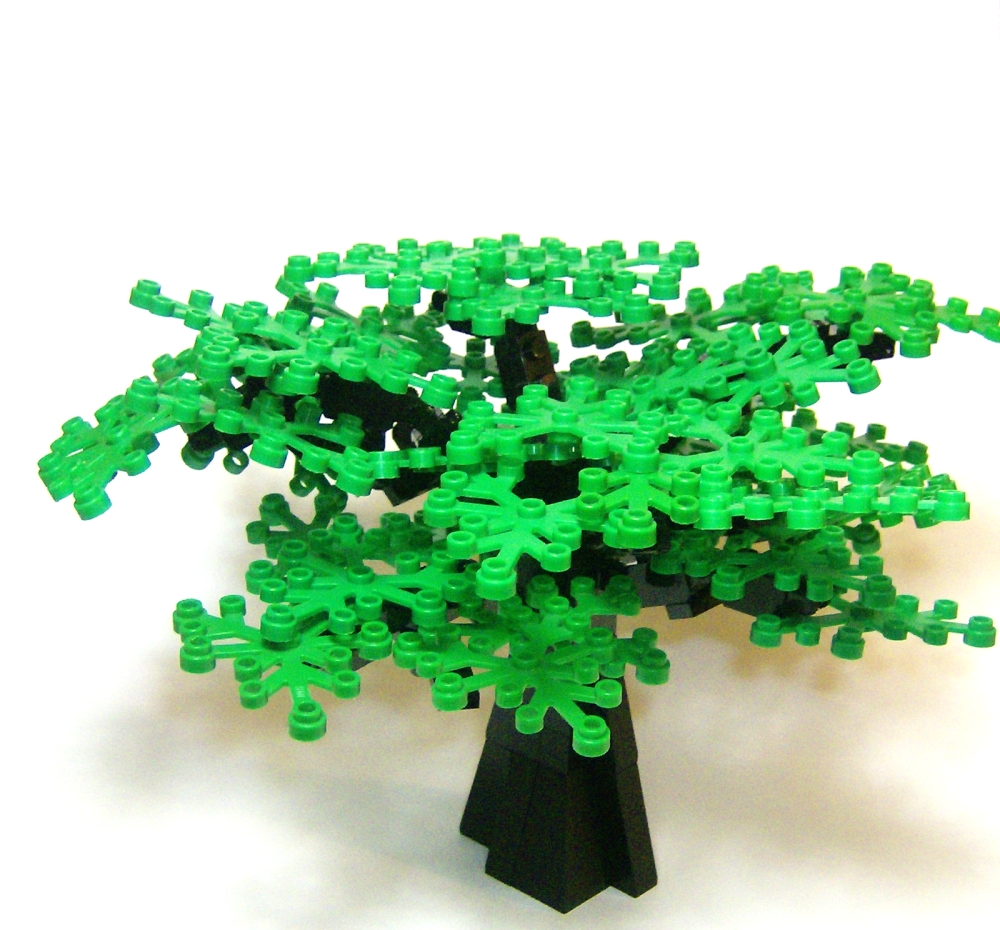
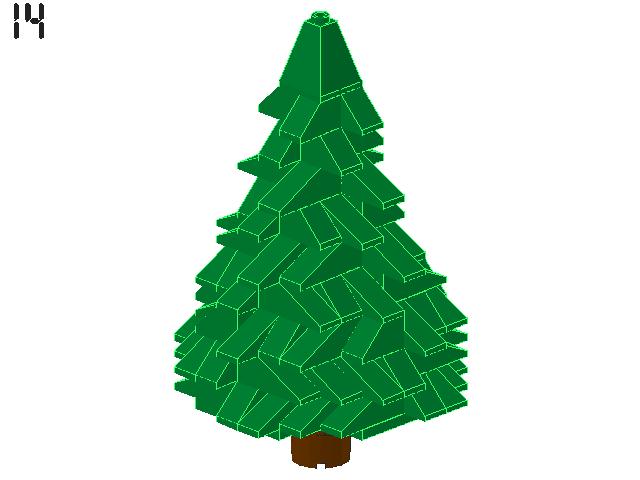
- Trees using plant pieces
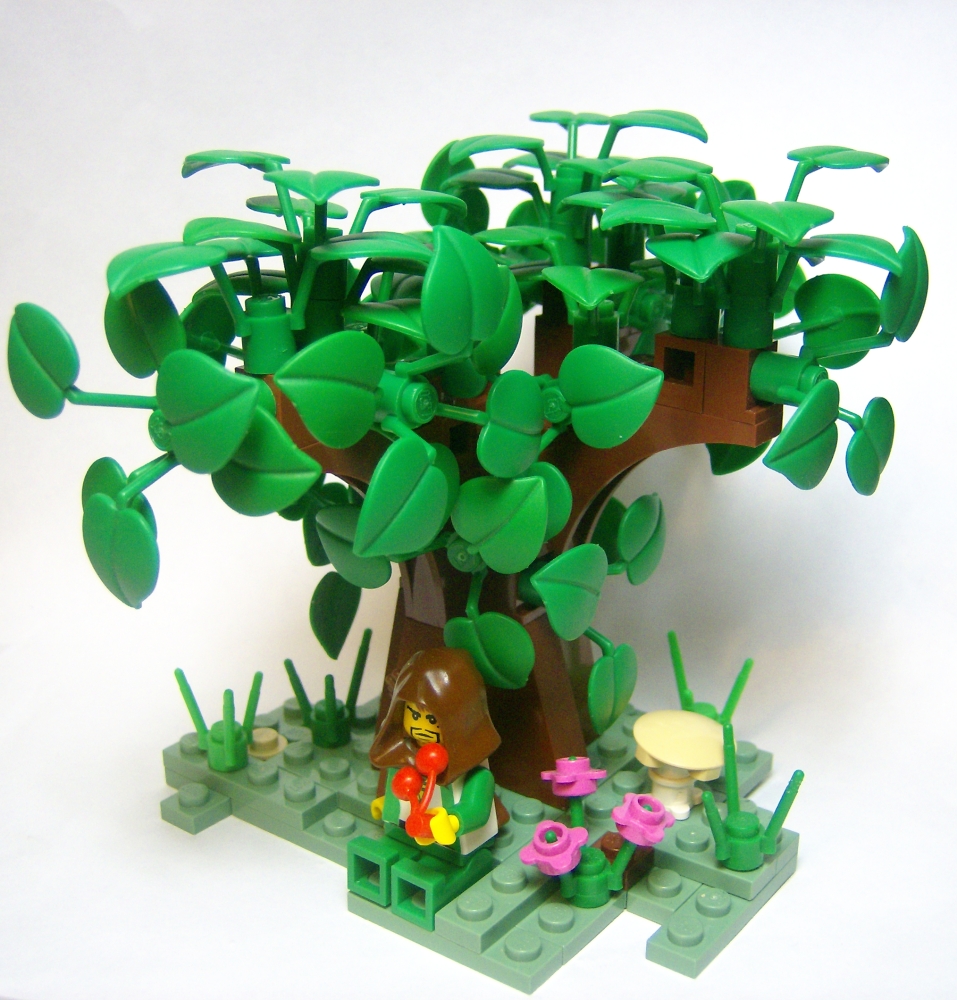 (by me)
 (by Anthony Sava)
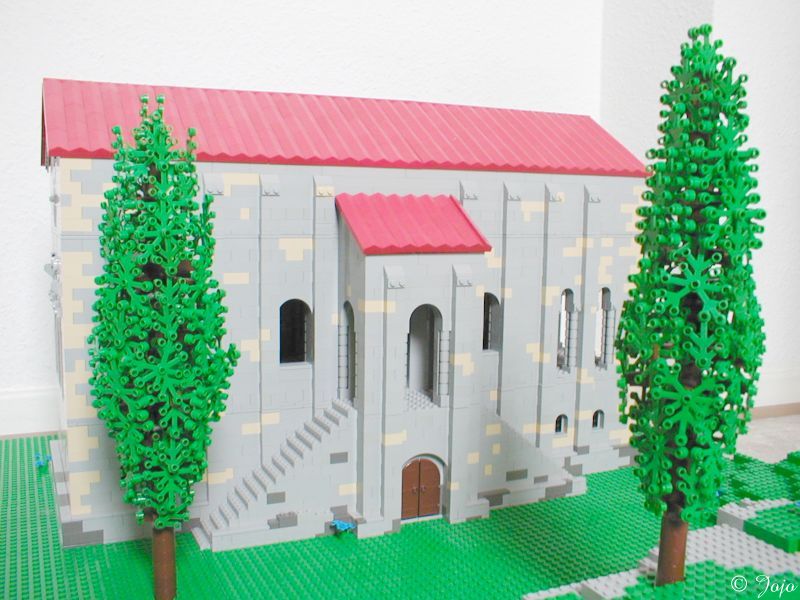
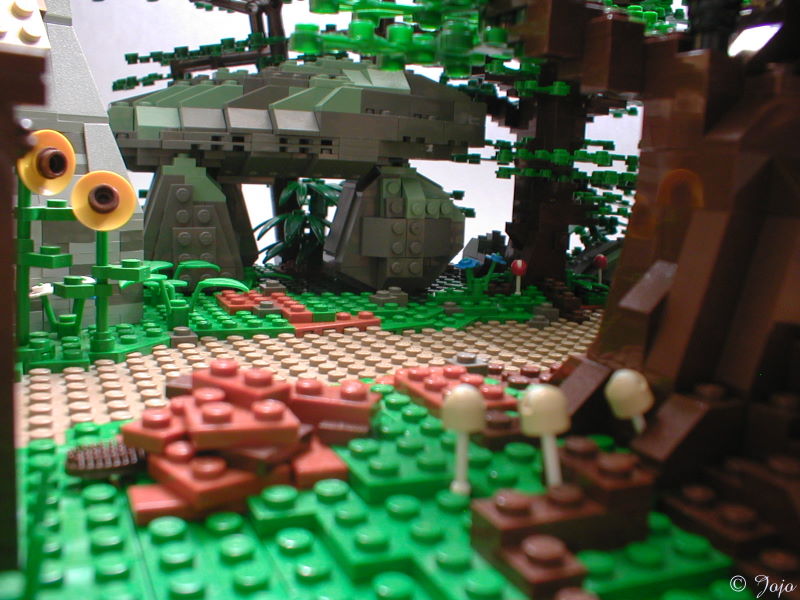
I love Johannes Koehlers (Jojo's) trees:
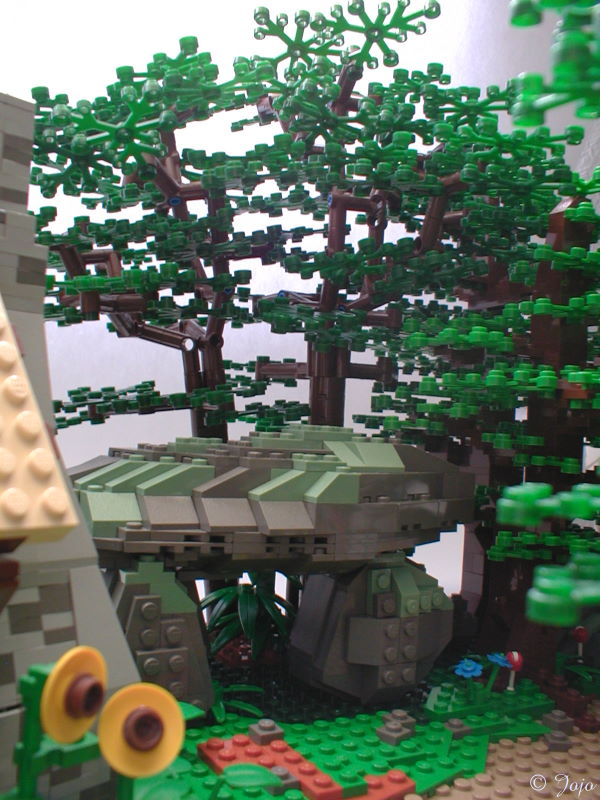
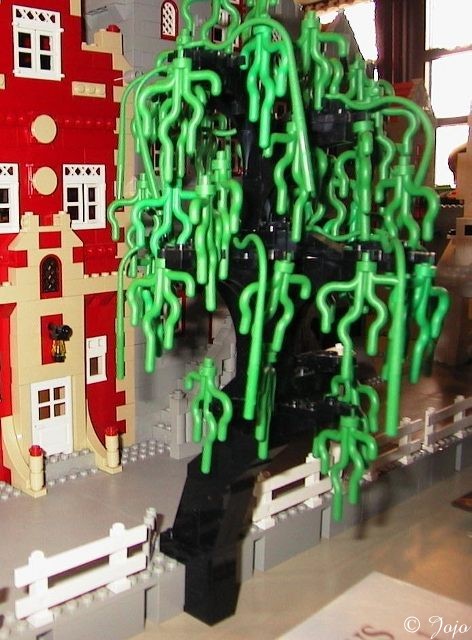
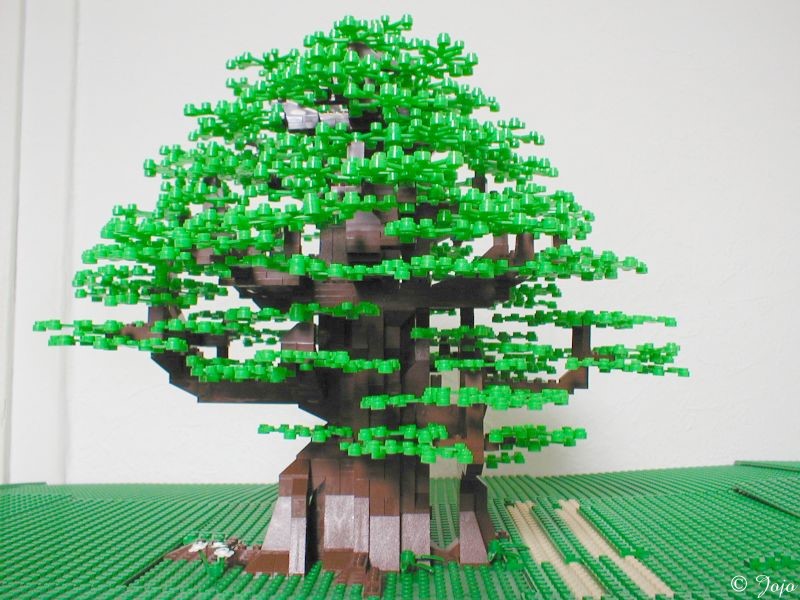

And here are more trees by other builders:
 (by Sir Nadroj)
 (by fifi) (by fifi)
 (by me)
 (by me)
 (by me)
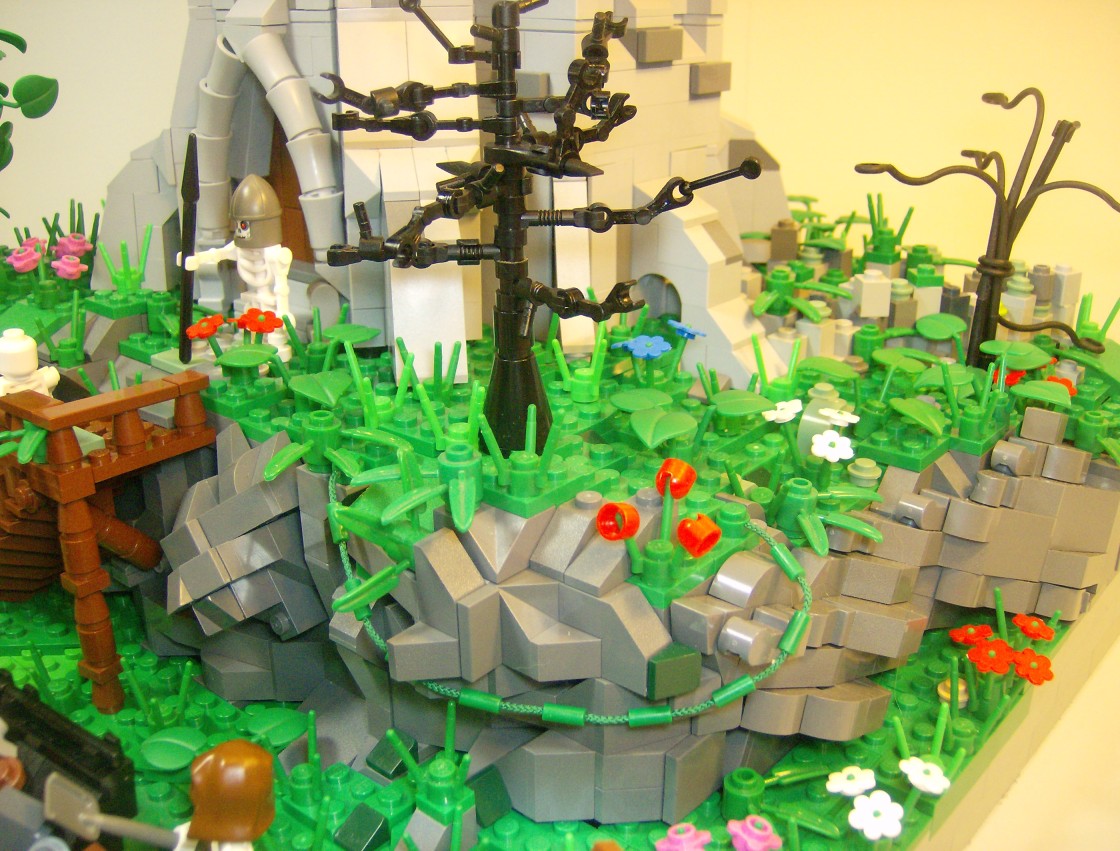
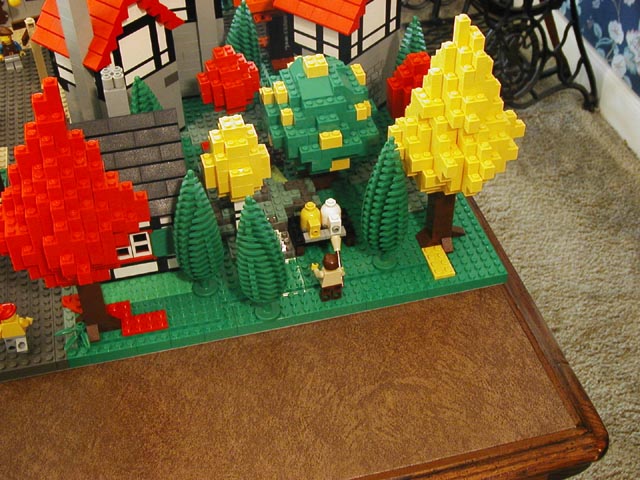
- Trees using regular bricks, plates and slopes
 (by Anthony sava)
 (by John Langrish)
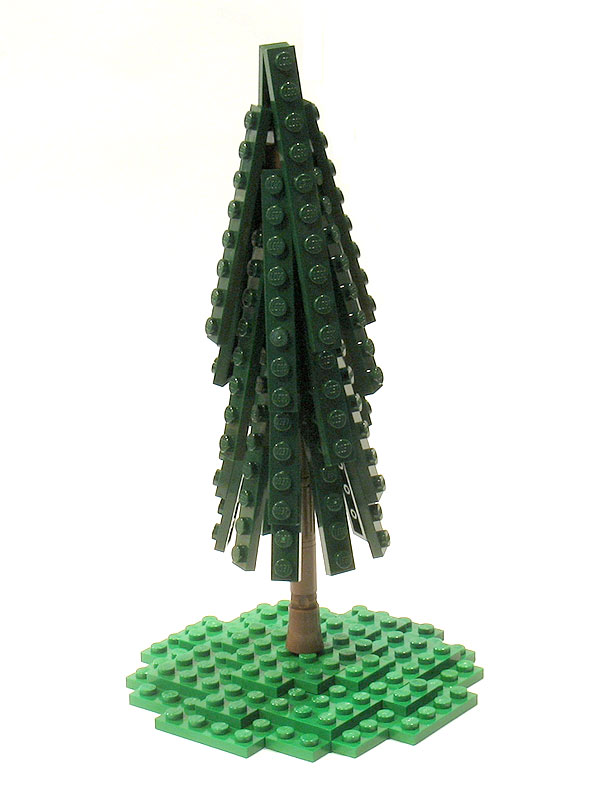 (by Xifux)
 (by roj2323)
 (by Bruce N H)
- Smaller plants
Here are some nice mushrooms, plants and flowers:
 (by Jojo)
 (by McBricker)
 (by me)
 (by Jalkow)
Check out Anthony's article for more small plants and flowers.
Rocks
- Rocks built with BURPs

The fastest and easiest way to make rocks is by using BURPs (Big-Ugly-Rock-Piece). There is the rectangular rock piece and the triangular rock piece (sometimes called a LURP). If you make rocks with BURPs it is important to combine them with bricks and slopes, so the rock wont look the same everywhere:
That is, try to avoid this:

(by Bruce N H, offered by him as a bad example)
- Rocks built with slopes

Another way to make rocks is by using slopes. This technique is quite popular right now, and can look very nice if its done well, but its expensive to buy so many slopes, and its very time consuming to build the rocks.
 (by Steve DeCraemer) (by Steve DeCraemer)
You have to be careful when using this technique that the rocks wont look unnatural. To avoid that I usually use different colored slopes and plants.
More examples:
 (by me) (by me)
 (by RebelRock) (by RebelRock)
 (by Noddy) (by Noddy)
 (by The eggplant wizard) (by The eggplant wizard)
- SNOT and tilted rocks
My favourite way to make rocks is by tilting part of the rock and putting other parts of it on their sides. This makes the rocks look more natural and random.
- SNOT rocks:
 (by me) (by me)
- Tilted rocks:

 (by me) (by me)
Here is another great example by Mark Kelso:

If you have any questions or comments regarding this article or about building landscapes, feel free to PM me at the forum, my username there is DNL.
Daniel Z "DNL"
All pictures of other peoples' MOCs were taken without direct permission; however, all pictures are available publically on Brickshelf or MOCpages and I've linked to the originals (click the pics) - if the author of any picture would like it taken off, please PM me or e-mail one of Classic-Castles admins and I'll take them off.
Appendix
In the original thread discussing this article, SlyOwl had several things to add, which are attached here as an appendix to DNL's original article.
Grass-scaping
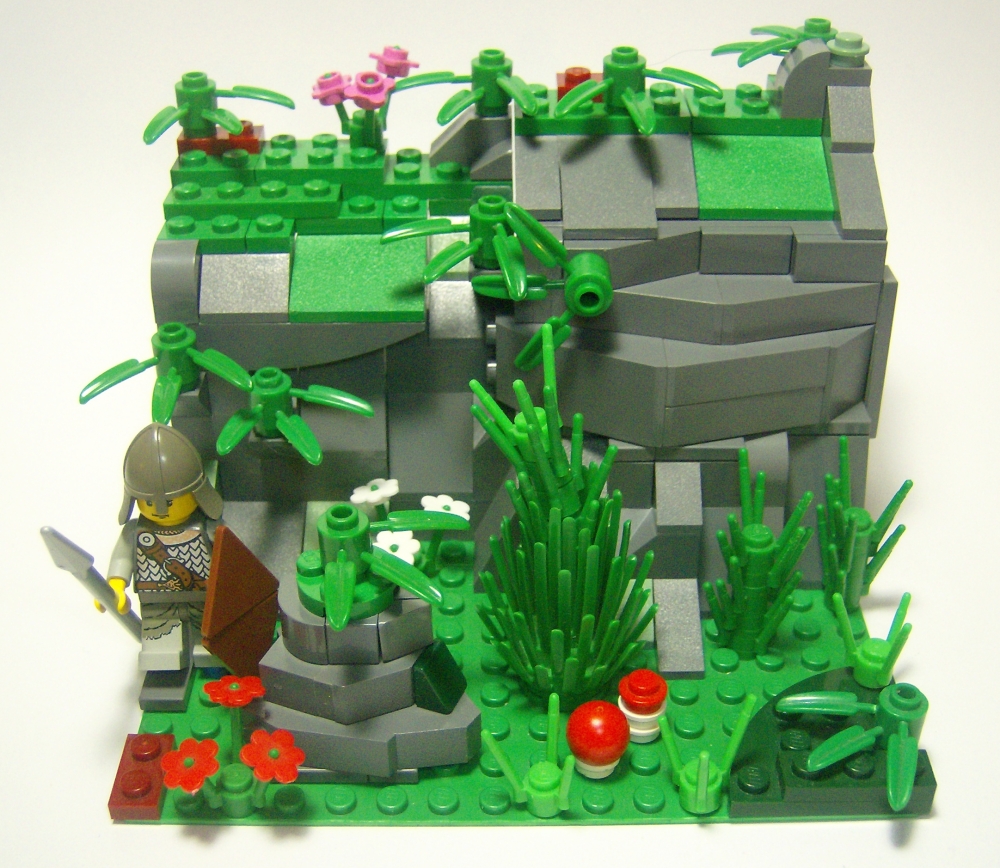
In regards to grass-scaping, I'm not a big fan of using slopes in conjunction with pure studs-up construction, as the smoothness in contrast to the studs makes it looks funny - not the same type of grass - to me.1 In this instance a few tiles/slopes elsewhere in the grass-scaping gives a more uniform "rough" effect.2 However, I think it looks better to build grass only studs-up, which implicates the use of angled plates where steeper gradients occur. This can be as simple as using a 1x2 plate, but not pushing it down fully, although it still holds in place. As I don't use a plate differential of more than one plate high for grass,3 this is useful if the drop needs to be greater than this. As the gradient increases, tilted plates won't hold in place as well, so hinges are necessary, especially 1x2 hinge bricks. This, in conjunction with jumper plates and small plates, to ensure that there are no gaps around the plate, allows for the steeper gradients to be successfully achieved. For example:

Note the use of jumper plates between the two pillars to fill the gap between the plates. Also in the example can be seen a grassy overhang using a tilted wedge plate in the middle foreground - this ensures that there is no sharp edge between cliff and grass. On the left you can see the use of 1x1 plates slightly below the edge of the cliff to give a less barren cliff face, and to smooth out the otherwise sharp contrast. This is better shown in Aaron's Dwarfs' Gate:

This can be taken even further, in particular using wedge plates, to achieve an even curvier landscape:

This is very difficult to achieve, and requires lots of patience and rebuilding - 1x2 hinge bricks, jumper plates and 1x1 round plates are your allies here, but it's nigh impossible to instruct how to do. Simpler to do is to leave gaps between the plates, to give a disintegrating feel, as in this by cjedwards:

A closer look at angled grass-scaping is found in this short article.
As DNL mentioned, another major aspect of grass-scaping is breaking up the uniformity. I'm not such a big fan of using plates in other colours, but the use of small plants, especially these three, is a cheap means of doing this:
  
Those are roughly 7 cents, 3 cents, 15 cents, respectively, if you shop around or go to a Pick-a-Brick. In banks of plants, and in other colours, they provide a contrast and fill up unused space.4 They can also be used to fill in gaps between different plate heights, especially the first type:

Other mudane objects to break up the landscape include trees (notably in large displays, built over numerous baseplates), small rocks and plants, as aforementioned:

small animals like sheep:

or rabbits (original design by Micah Berger):

fences:

and water features:

Water-scaping
Water can be used to save parts by using another colour to surround it, especially brown, dark tan, bley and dark grey, in plates:

slopes:
 (by Jordan) (by Jordan)
or tiles:

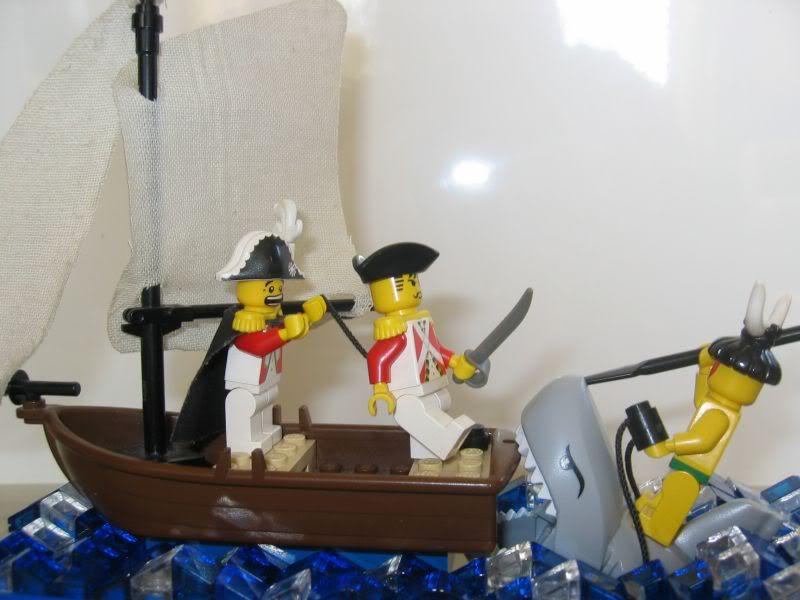
They also allow for extensive use of plants, which can hide any plain or incomplete lanscaping underneath, as in Jordan's Fabuland goat example above. As DNL said, blue SNOT water is cheapest and easiest, and can be greatly enhanced with light blue, dark blue, teal and white highlights, 1x1 round trans blue and clear plates as bubbles, or various horns as waves:

Mixing in trans colours with solid SNOT isn't perhaps the best idea - it didn't come out too well in the troll bridge shown above. As DNL mentioned, a wall of 1x2 bricks can be bent into a curve. This can be employed to create waves:

Another method to create ripples is to use Chris Wunz's rough-hewn technique, using 1x2 blue bricks (it doesn't show too well in the photo, and looks better in real life):

It is also possible to use Jordan's rough hewn technique for the same purpose, or to venture into more outlandish waters (badum-tish! ROFL) of old-style train tracks:
or fiber-optic cables:
 (by Jordan) (by Jordan)
That said, studs-up water is always an alternative, and beneficial when doing more complicated shapes:
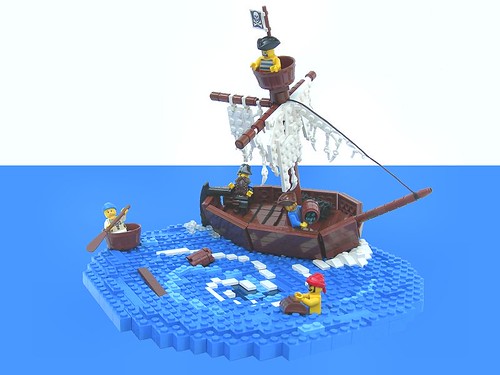
As with grass, a few tiles here and there can help break up the monotony. Also worth noting is the use of many cheesers for ripples/waves - effective, without any extensive sculpting required:
 (by Captain Greenhair ) (by Captain Greenhair )
Water is normally the starting point for any Castle or Pirate MOC for me, and that's why they normally contain some! LOL
Rock-scaping
In regards to rockscaping, it is also worth mentioning that tiles and angled bricks (using panels and 1x2 hinge bricks to hide the joints) are ways of bulking out the amount of sloping that can be done:
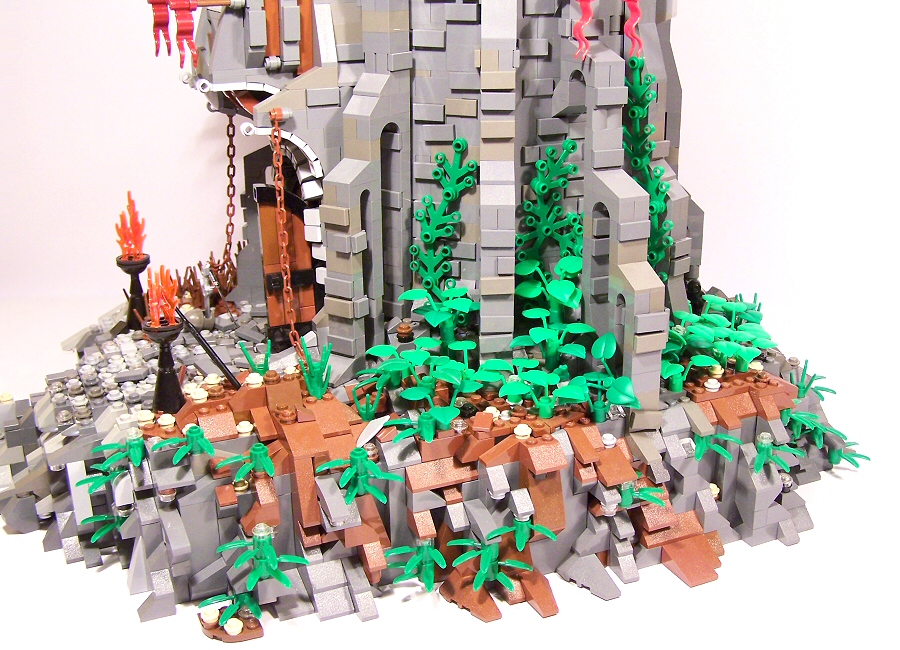
Arches and parts such as elephant legs are useful for weathered landscape - in this MOC I had originally intended to use elephant legs for the arch in the top right corner, but found they curved the wrong way. Had I built the MOC the other way round (flipped horizontally, it would have worked). In that example, the rock is not on a square blueprint - the different angles of rock are built at completely different angles, rather than the use of a technic brick to rotate a section, as in some of DNL's examples - it's weaker, but more effective in certain instances.
One main, and very simple and cheap, type of rockscaping not fully explored is similar to BURPage - just building with bricks. This doesn't necessarily mean purely vertical or rough-built cliffs - you can use 1x1 green slopes, various plants (notably mushrooms 5) and slopes to remove any exposed grey studs, if that is a problem:
It's more flexible than BURPage, and doesn't have hollow studs; however, on its own, it can look blocky, so a mixture of various techniques is probably best.
Half-stud offsets using jumper plates are also a useful technique to create a slightly smoother rockface:

For rocks, colour-wise, light grey/bley and dark grey/bley are best (the bley variants being more useful, due to cheese slopes), but brown, black and white are all possibilities, particularly for creating atmospheres:
Notes
Except where otherwise noted, the MOCs pictured in the Appendix are by SlyOwl.
1 However, in certain instances, such as to achieve a cartoony or atmospheric effect, I recognise its potential:
 (by 3730) (by 3730)
2 SNOT or tiled grass can be well used for trodden or manicured/mowed grass, such as in Benlego's vignette:

However, the large majority of times, especially in a Castle setting, it isn't the most realistic form.
3 Higher differentials can be effectively used for more uneven surfaces, however. It's just personal preference.
 (by Rocko) (by Rocko)
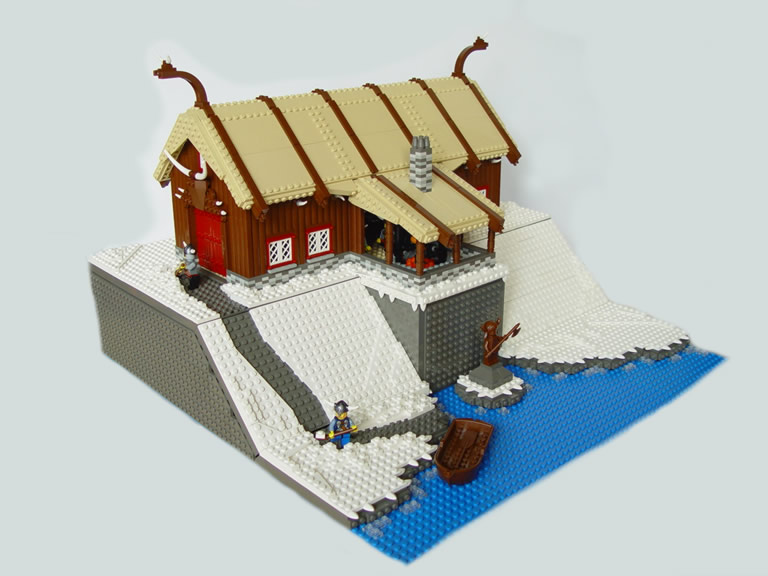
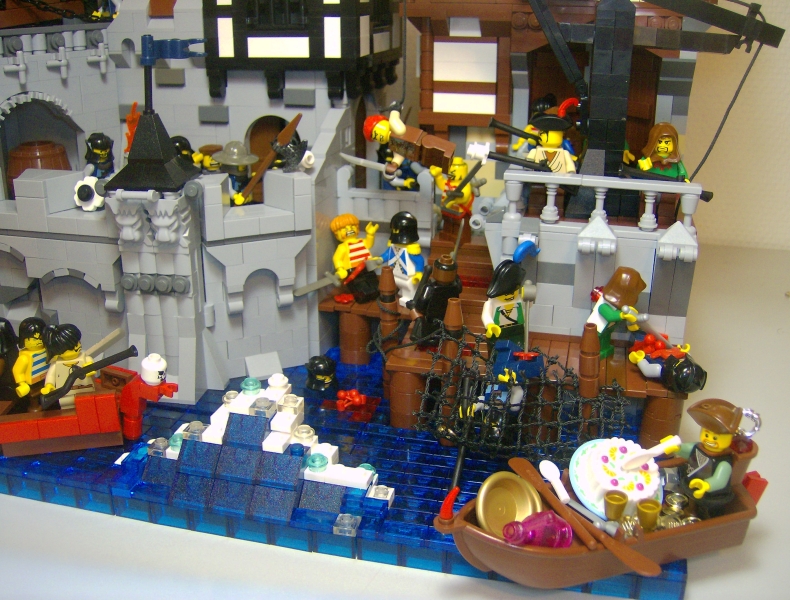
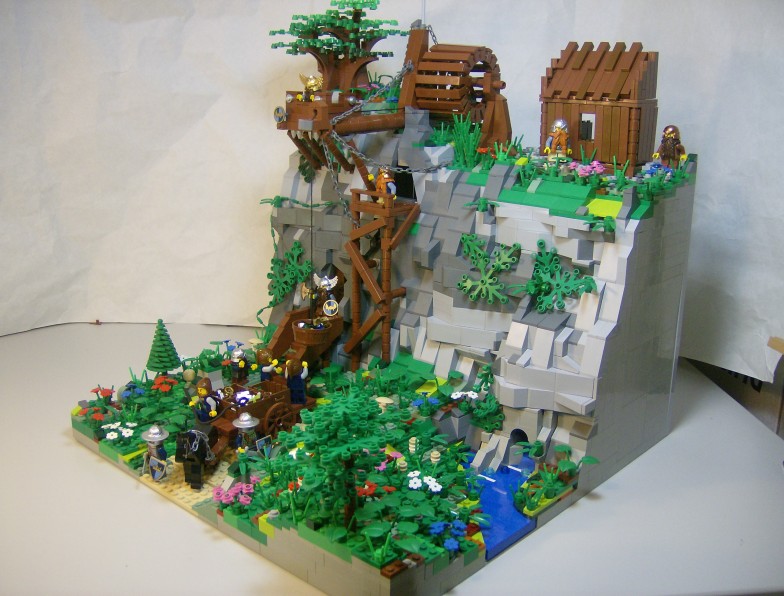
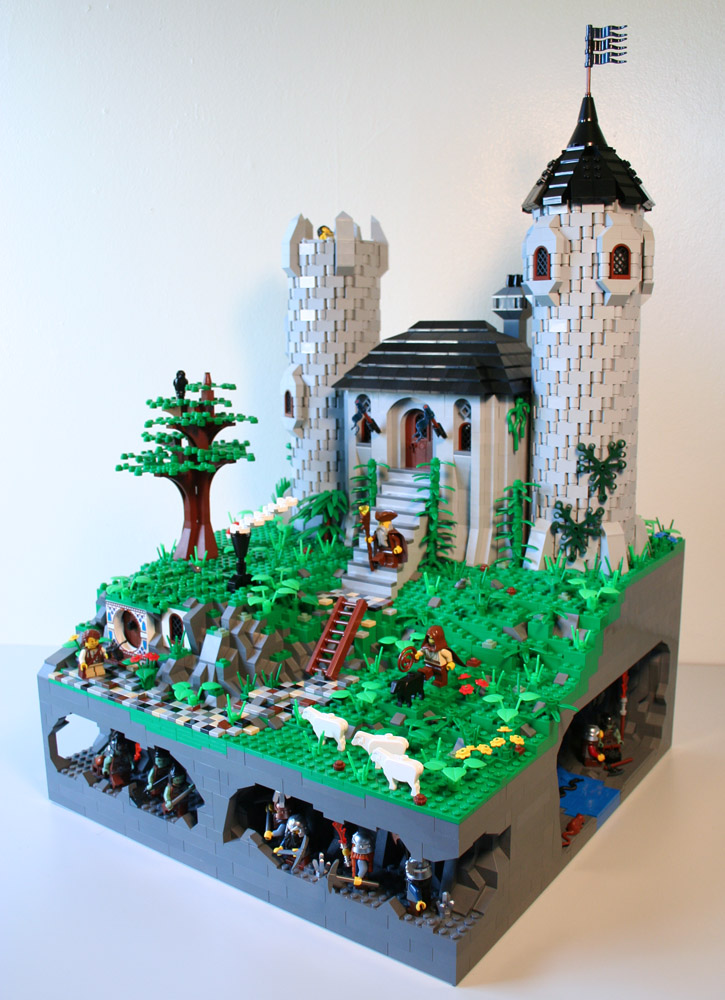
4 DNL touched upon when and how to landscape, which is an important factor to me, especially as it plays a key part in many of my MOCs. Landscaping is time and brick consuming. It can be weak, especially when done at angles, or with hinges. It can be difficult to position minifigs on, especially when on a steep gradient, as it limits how their feet can be positioned (only at right-angles). However, I see it as an integral part of a diorama. In ye olde times, and still today to an extent, the landscape affects buildings in design and position. It can be used to hide unwanted parts of a MOC - in this example, the minimal lanscaping around the milk trough hides the bases of the headlight bricks used to hold the treasure chest lids in place:

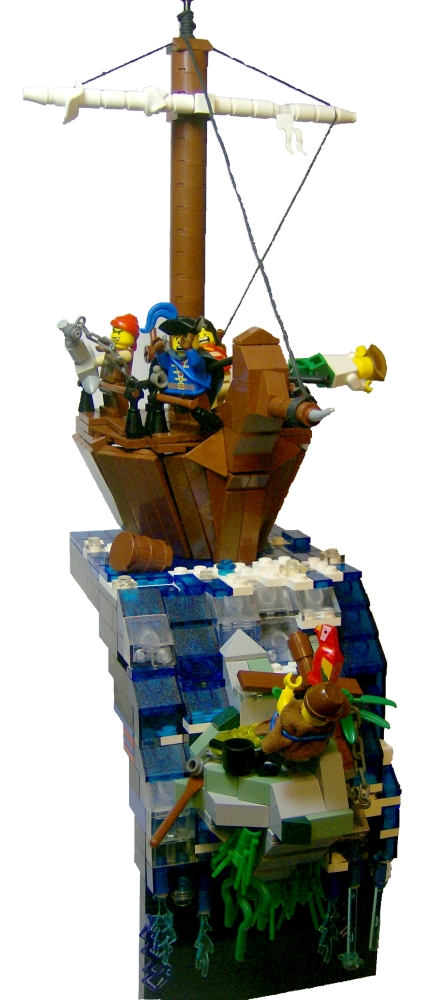
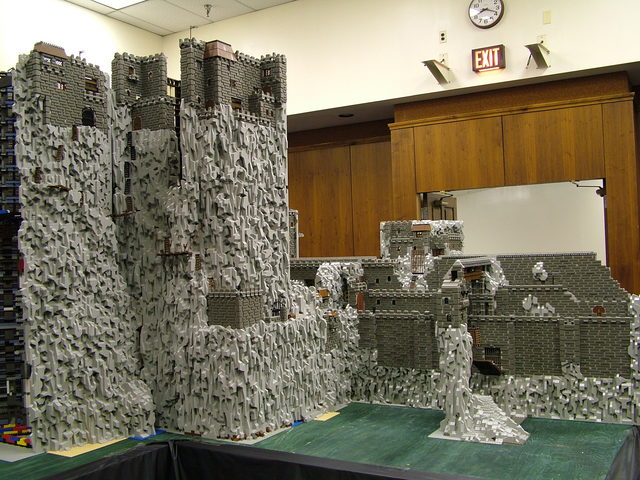
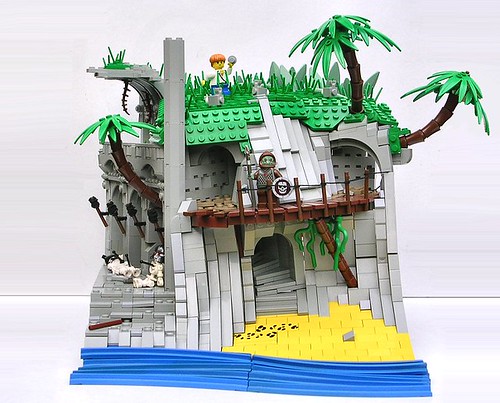
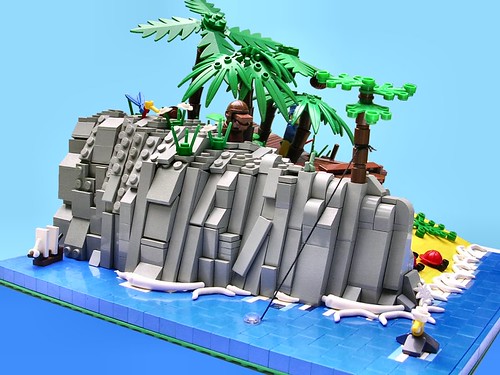
Landscaping can be used to fill up unused space, or to add height and background to a MOC:
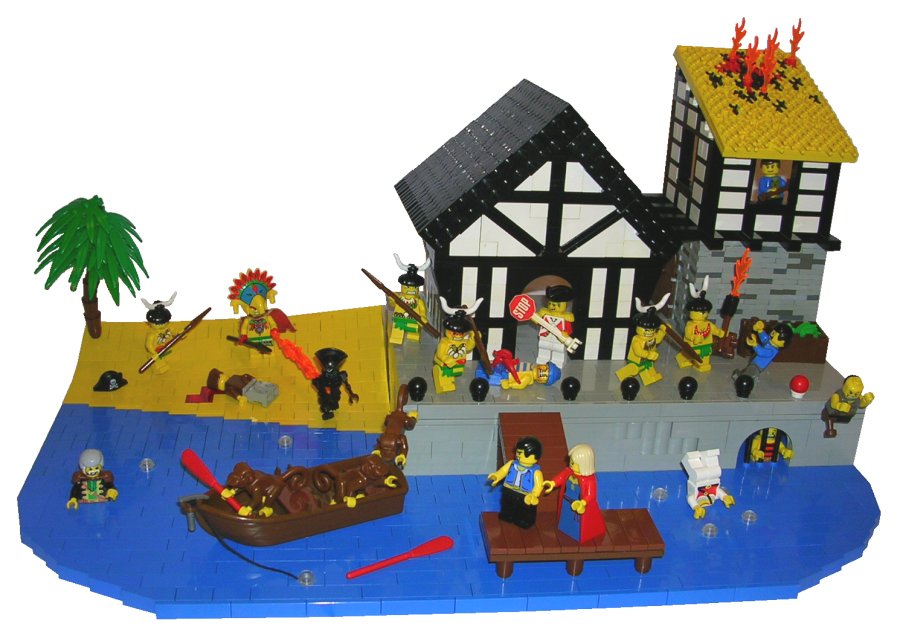
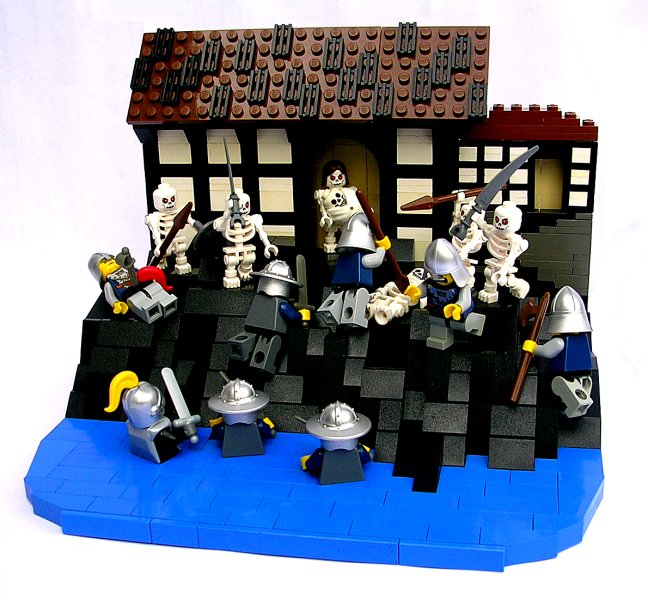
This height, along with water, is a style I often use to add action to a MOC:

However, the background may become too cluttered, that it obscures the content. I take as an example DNL's MOC - as I recall, Bruce mentioned at the time in his CCCV comments that the multi-coloured landscaping cluttered an otherwise brilliant MOC.
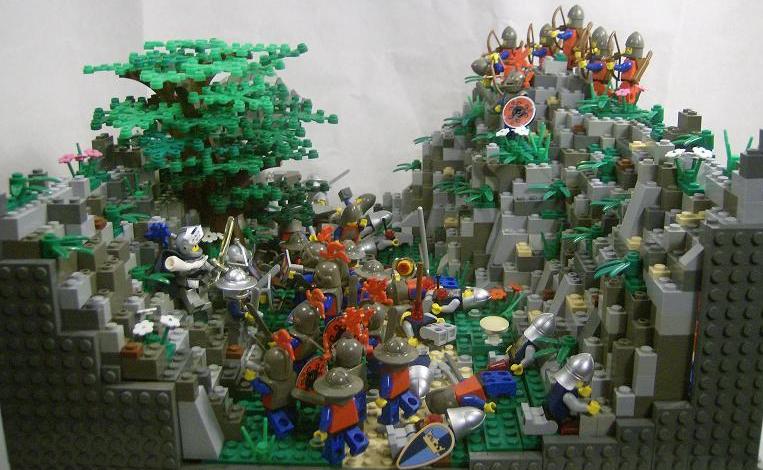
Note added by Bruce in editing this article: My point in some of my contest commentary was that when there was a lot of action in a scene, it's better if the background is more monochromatic. On the other hand, if you have a structure that is all one color (a gray keep, for instance), it is often good if the surrounding landscaping is more varied. It's like wearing a striped shirt with plaid pants - better to have one of the two pieces of clothing be a solid color. Okay, not like I wear plaid pants. Perhaps a better example would be wearing a solid color tie with a striped shirt, and a patterned tie with a solid shirt.
5 Besides those in the article, Tiberium Blue has got some neat ones:


|
|
