GIMP: Free Image Editing For All
by Kevin Blocksidge, 25 IX 2004
Have you ever wanted to crop out unwanted parts of pictures? Or perhaps resize a photo? Maybe you think that all the programs capable of doing these things are way too expensive. Well think again! In this article, you'll see how to use TheGimp, which can be downloaded for free!
Gimp can be downloaded for free at the GIMP Website. On the left hand side, you should find 4 links, called GIMP from Source, for Unix, for Windows, and for MacOSX. Click on the link that matches your system, and you'll soon be on your way to having a copy of GIMP!
Once GIMP is installed, you'll be ready to go.
I'll use a picture from my first published MOC, Earthflower, as an example.
Cropping
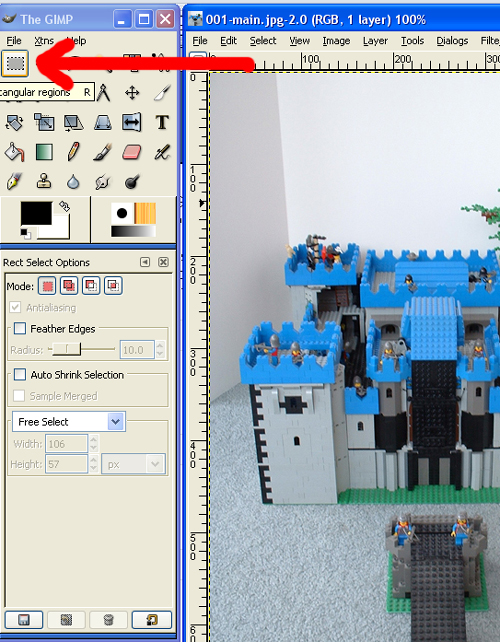
Cropping is when you take a picture and then cut out some of the surrounding parts of the image. For example, this picture could use some cropping, as there is a large border of irrelevant pixels.
First, click on the "Select Rectangular Regions" tool.
Next, place the arrow in one corner of the area you want visible, and drag it across the area to the opposite side. In this image, I've just dragged the tool all the way across, forming a box around the portion of the picture I want saved.

With the boxed area still selected, go up to the Menu Bar and click on "Image". Scroll down to "Crop Image" and click it.
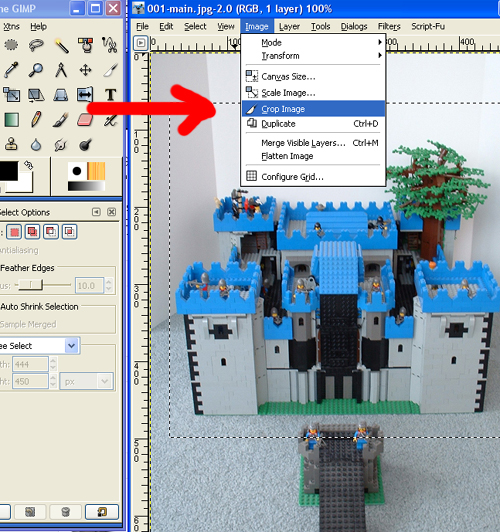
The image should now be only the part you want visible, and you are now ready to move onto...
Scaling
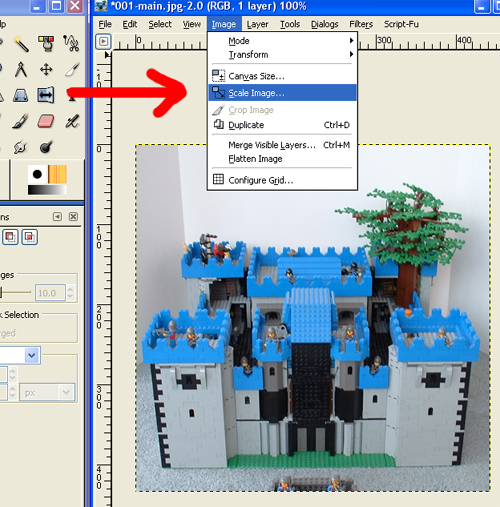
Often, a picture is much too large when initially uploaded or scanned onto your computer. Scaling is the process of reducing the image size to one easily viewed over the internet. I recommend images being between 400 by 300 and 640 by 480 pixels.
To scale an image, go up to the Menu Bar and click on "Image". Scroll down to "Scale Image" and click it.
An option box will pop up. In it are 3 main things to pay attention to.

Make sure that the ratio is locked (see arrow A). The X and Y values should be equal, or else your picture will become distorted.
The up/down arrows will change the picture size, or you can manually type in values by clicking on the white number boxes (see arrow B).
The box pointed out by arrow C gives options for the unit of measurement the values of size are given in. I have it set in pixels (px), the most useful value for pictures intended for internet use.
Once you have set the size of the picture, press "OK", and the picture should now be resized. All that's left to do is...
Saving
Saving a picture might not seem that complex, but the main issue that will be taught is how to change the format (also known as extension) of a picture (.jpg, .bmp, .gif, etc). The most appropriate format for LEGO pictures is almost always .jpg, so that is what I'll show you how to do.
Go up to the menu bar, click "File", scroll down to "Save As" and then click that. A window much like this one will pop up.
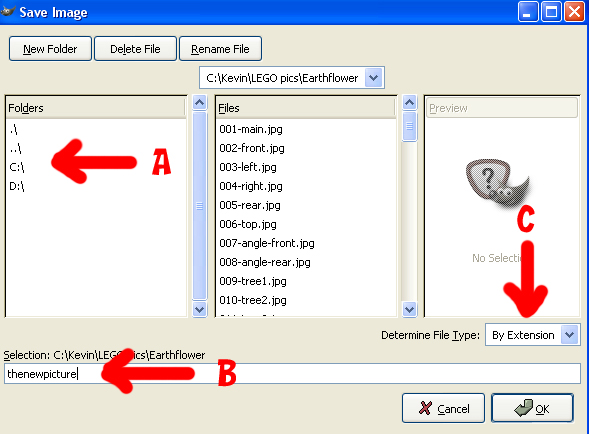
First, find the folder that you want to save the picture by clicking through your computer folders in the section denoted by arrow A. You can create new folder using the "New Folder" button at the top of the box.
Now, write a name for the picture in the lowest box (see arrow B). Do not add an extension.
Then, click on the extendable menu called "Determine File Type" (see arrow C)
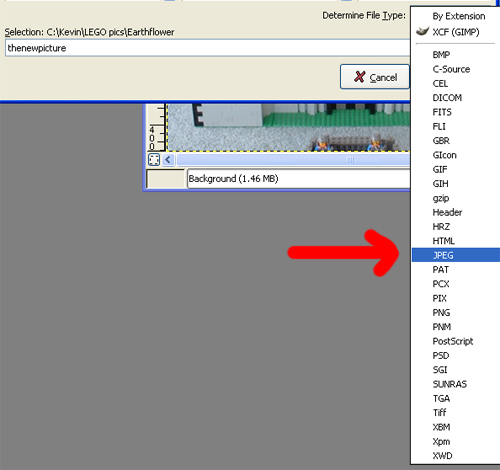
Scroll down to "JPEG", click it, and then press the "OK" button. A new option box should appear.
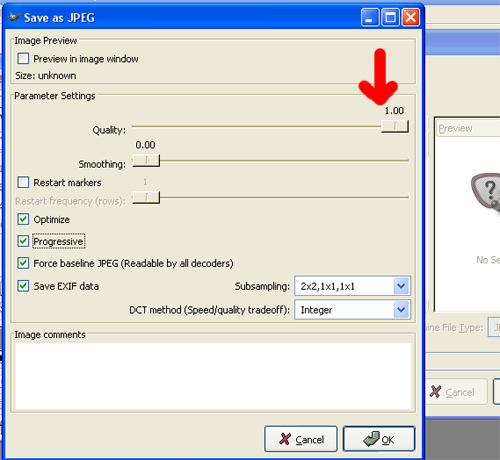
In this new box, there is only one aspect you should be concerned about, that being the number bar labeled "Quality". I suggest moving the bar all the way to "1.00", but in certain circumstance, like C-C forum avatars, a maximum file size is set. By lowering the quality, it will lower the file size, which might be a good way of making your avatar work on CC without reducing the picture's size.
Now press "OK" and you should be all set! You've just cropped, resized, and saved a picture. Do this to the rest of your pictures, and you'll be ready to start sharing your creations with everyone!
|